> ## Documentation Index
> Fetch the complete documentation index at: https://utopia.mintlify.site/llms.txt
> Use this file to discover all available pages before exploring further.
# Subgraph - Simplify your workflow
> An introduction to the Subgraph feature in ComfyUI, including how to create, navigate, and manage subgraphs.
The subgraph feature requires ComfyUI frontend version 1.24.3 or later. If you don't see this feature, please refer to: [How to Update ComfyUI](/installation/update_comfyui)
* Images in this document are made with nightly version frontend, please refer to the actual interface
* Some features like converting subgraph back to nodes will be supported in the future
A subgraph is a powerful ComfyUI feature that lets you package complex workflows into a single reusable subgraph node, making them easier to manage and share.
Think of a subgraph as a "folder" for your workflow – you can group related nodes together and use the entire collection as one unified subgraph node.
**Use subgraphs to:**
* Simplify complex workflows
* Reuse common node combinations
* Build more efficient workflows with modular components
## Creating a Subgraph
Select the nodes you want to group in ComfyUI
Find the subgraph icon in the toolbar
ComfyUI automatically creates a subgraph based on your selected nodes' inputs and outputs
Refer to [Editing Subgraphs](#editing-subgraphs), you can edit and organize the subgraph to create a fully functional node
## Working with Subgraphs
### Basic Operations
Subgraphs work just like regular nodes. You can:
* Change colors and names
* Use bypass to disable
* Apply all standard node operations
### Editing Subgraphs
**To enter edit mode:**
* Double-click the empty area inside the subgraph (not on widgets), or
* Click the subgraph edit button
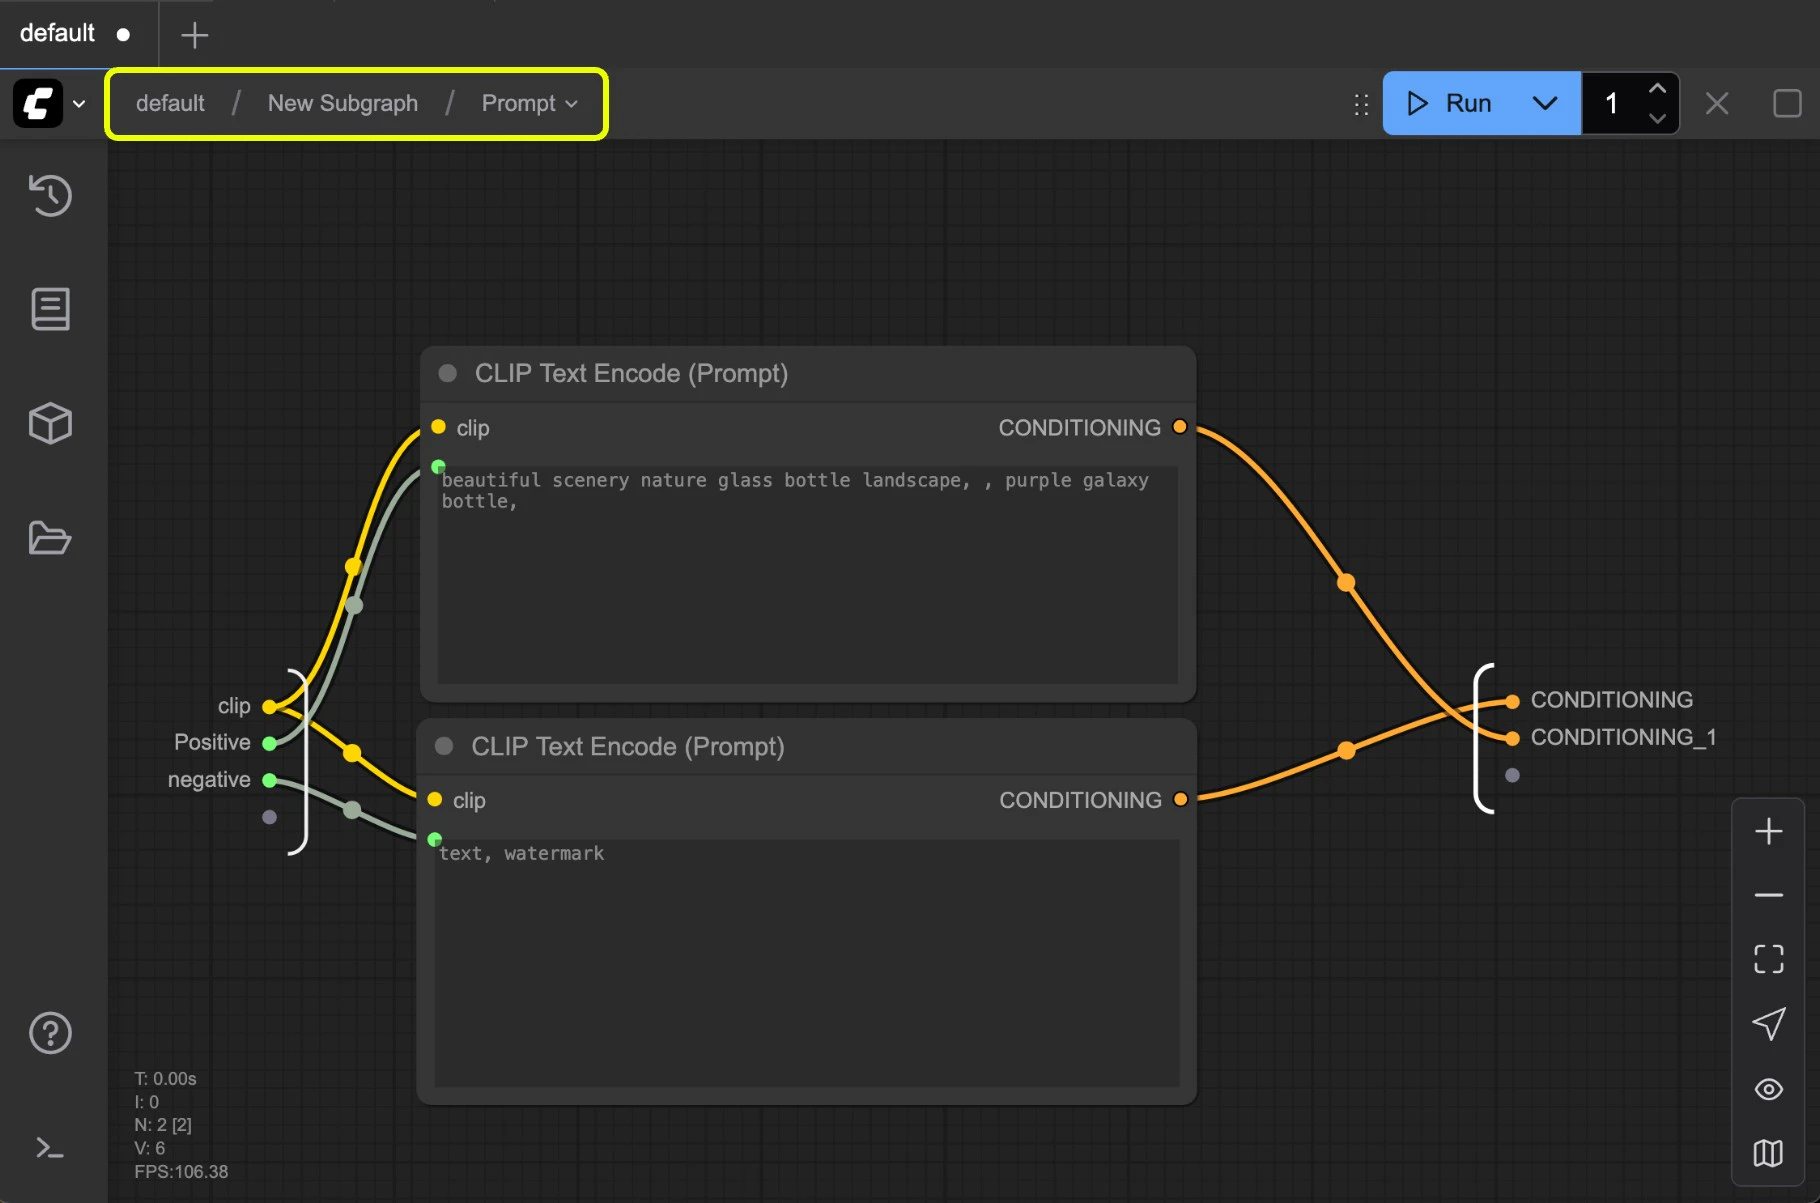
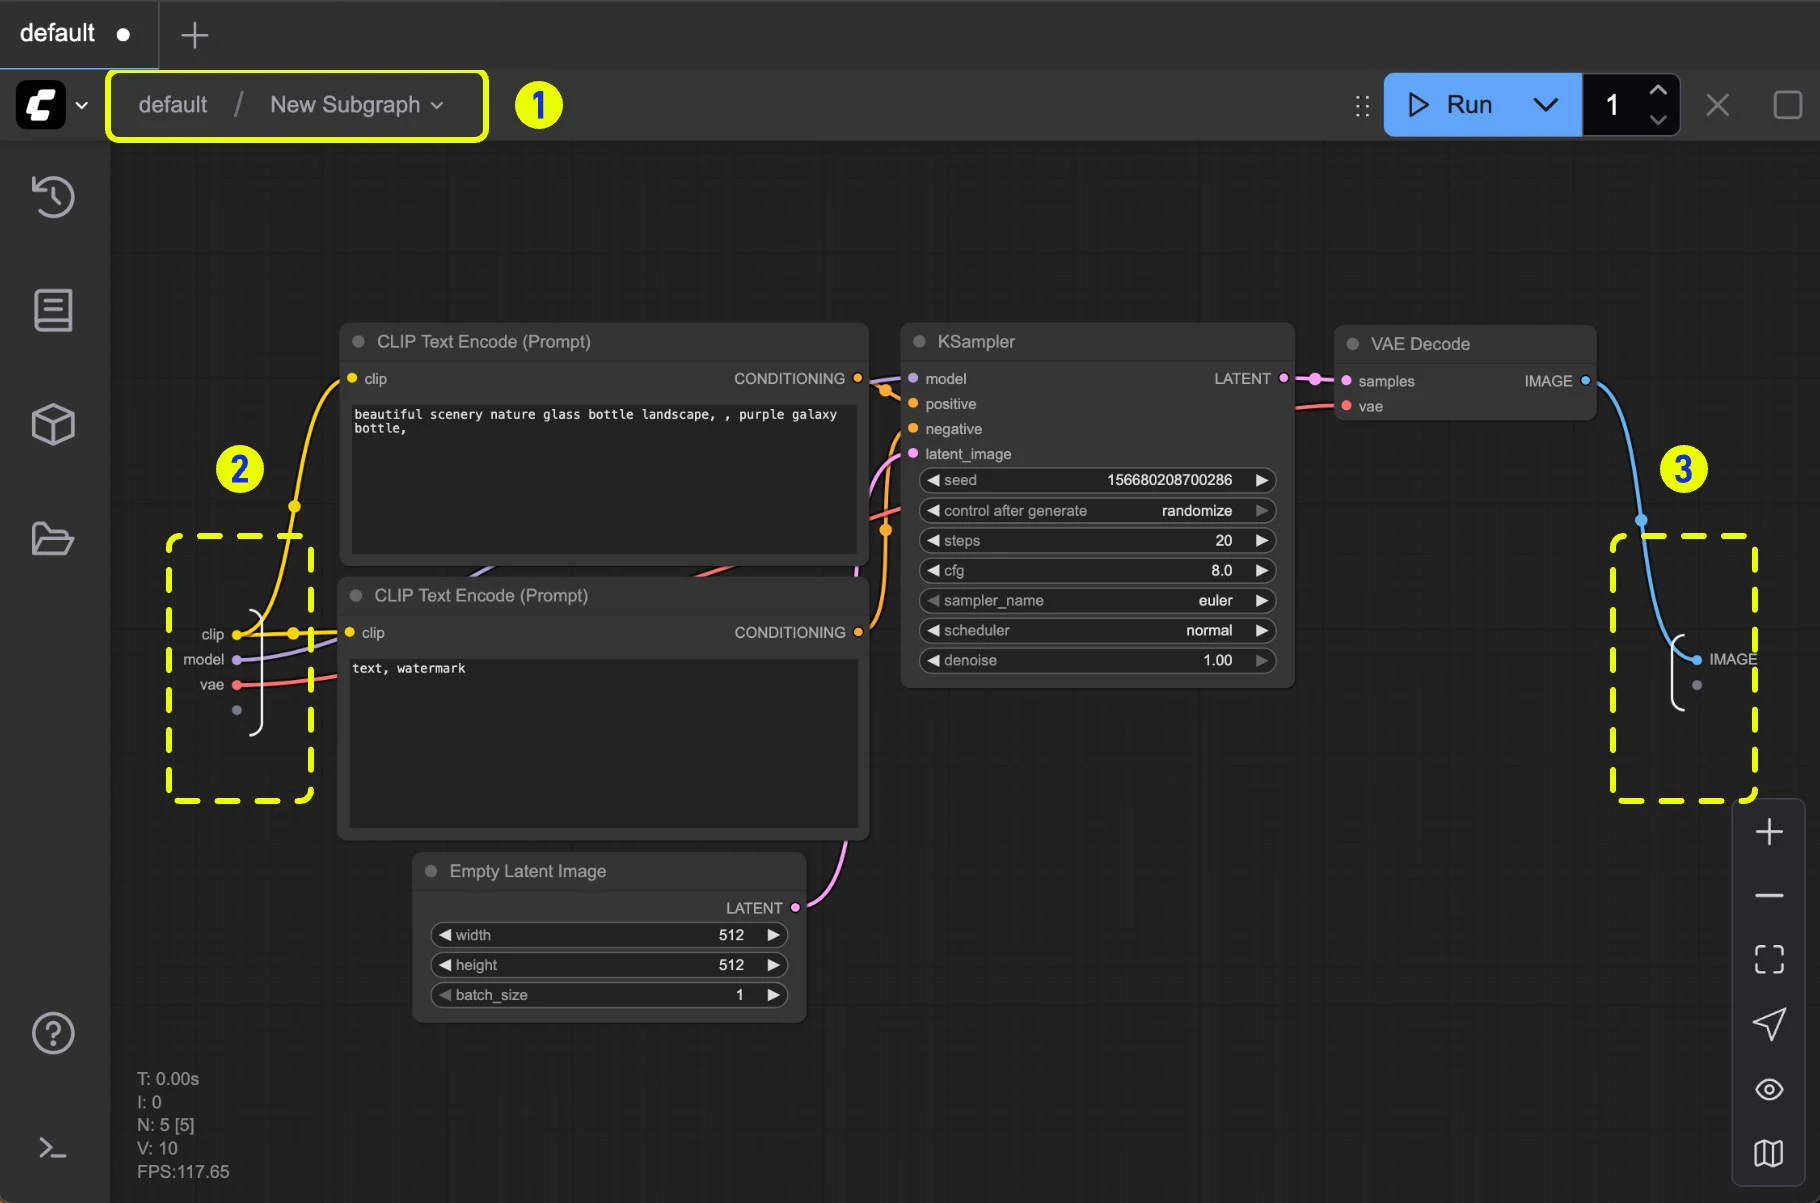
**In edit mode you'll see:**
1. **Navigation bar**: Exit the current subgraph and return to the parent level
2. **Input slots**: Internal node inputs exposed to the outside
* Connect outputs to slots like normal nodes
* **Right-click** connection points to rename/delete exposed slots
3. **Output slots**: Outputs exposed to the outside (same functionality as input slots)
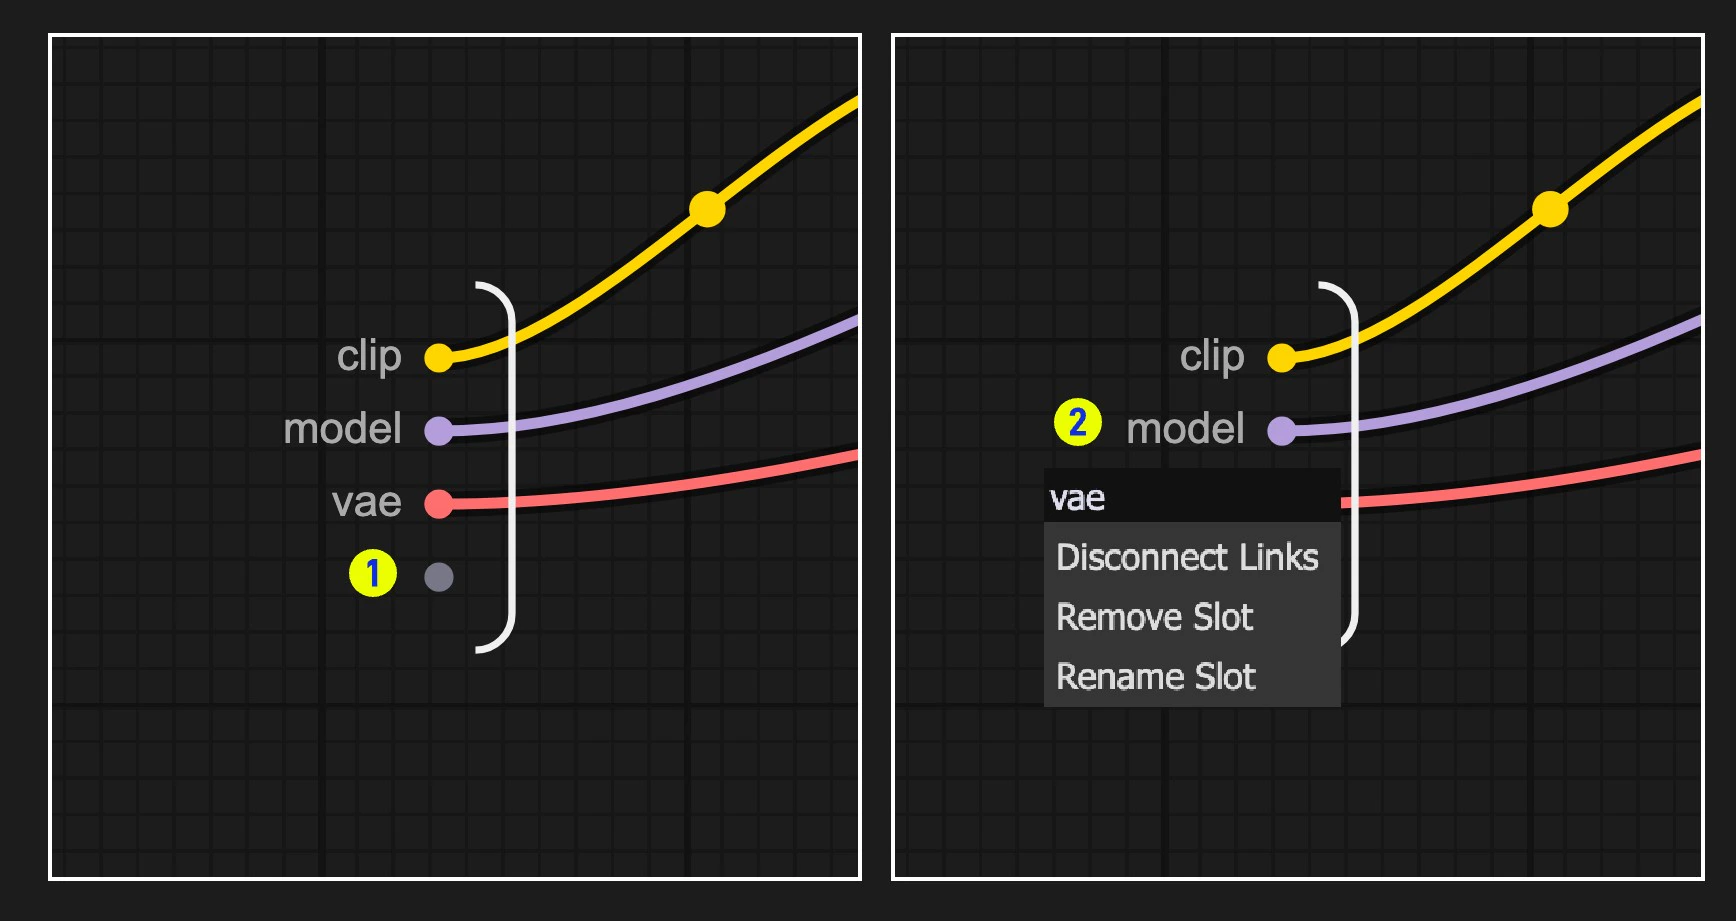
**Working with slots:**
1. **Default slot** (labeled 1): Use this to add new input/output connections
2. **Right-click** existing slots to rename, delete, or disconnect from original nodes
> Note: Slot connections follow standard data type validation rules
### Nested Subgraphs
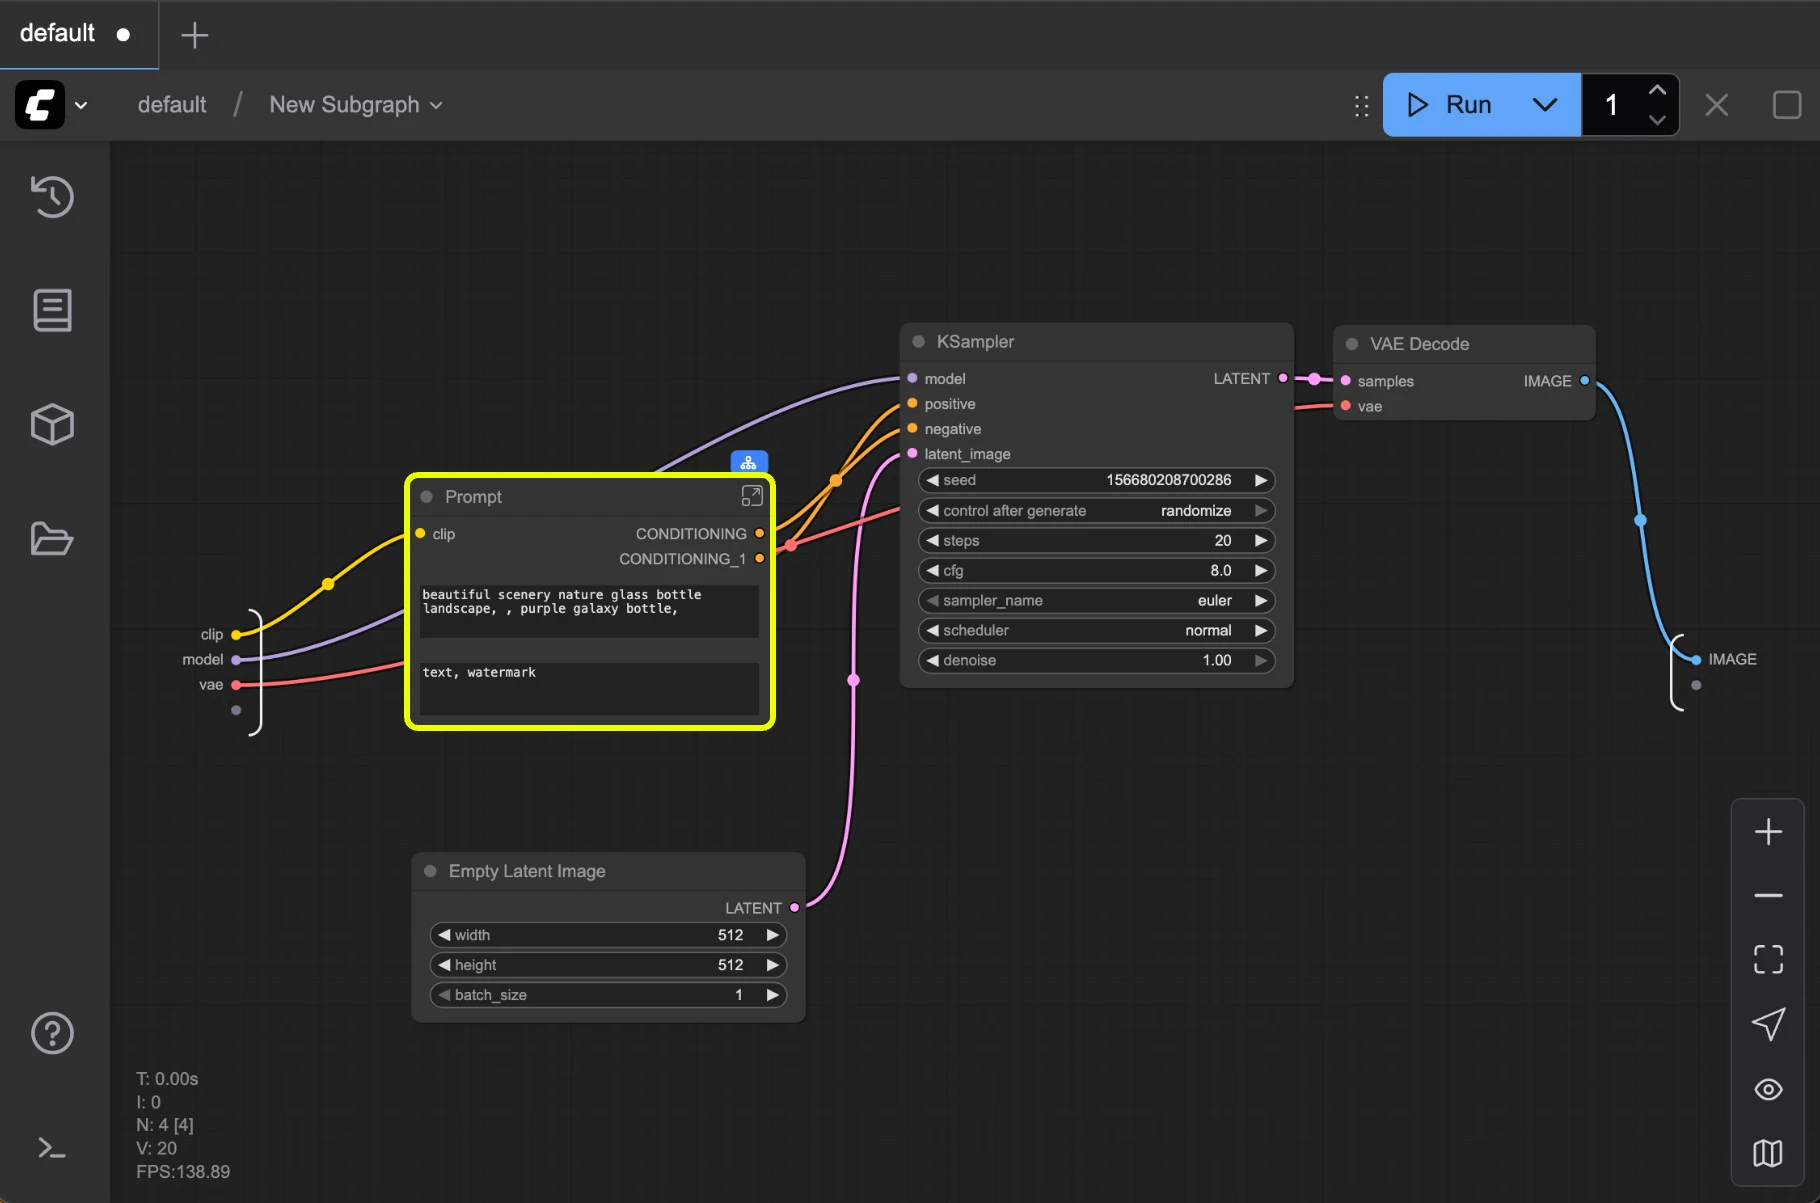
Create even more complex workflows by nesting subgraphs within subgraphs.
The navigation bar shows your current level and lets you easily move between nested subgraphs.
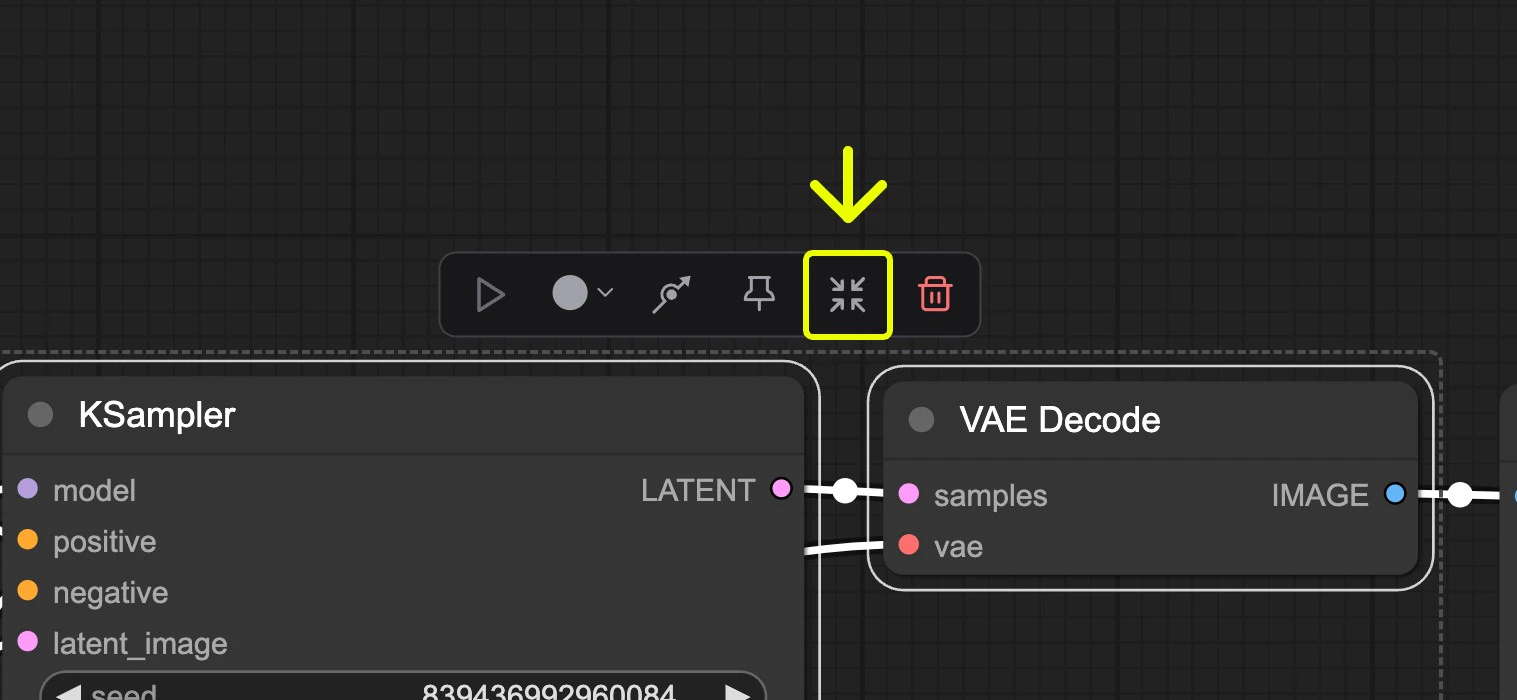 Find the subgraph icon in the toolbar
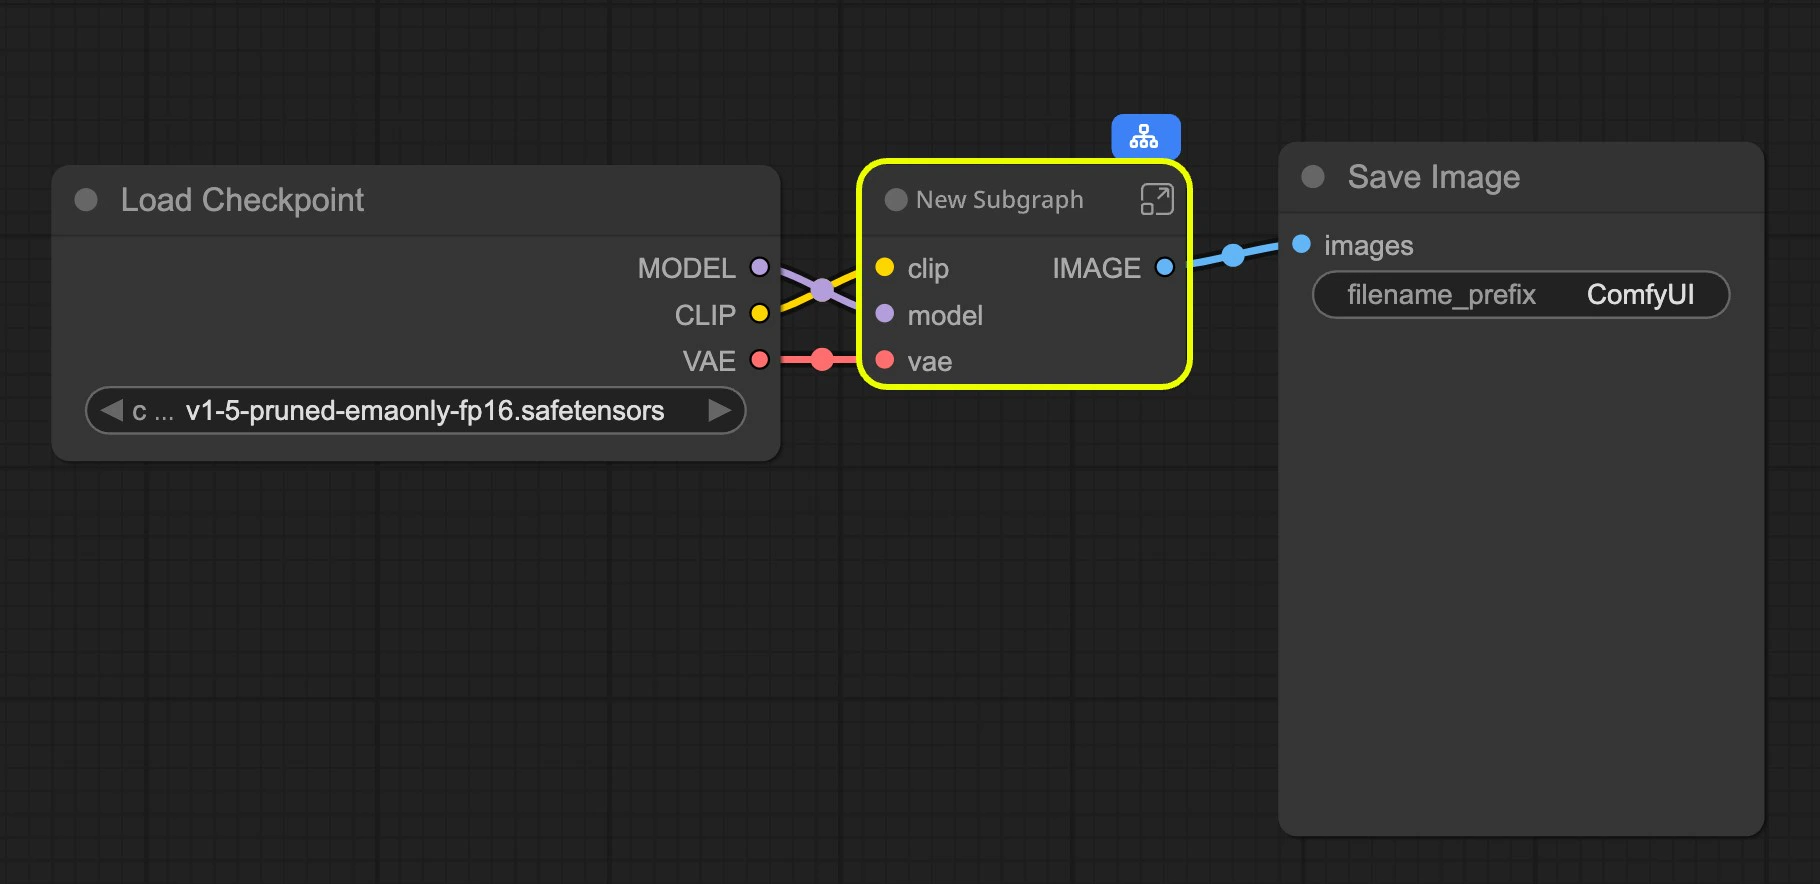 ComfyUI automatically creates a subgraph based on your selected nodes' inputs and outputs
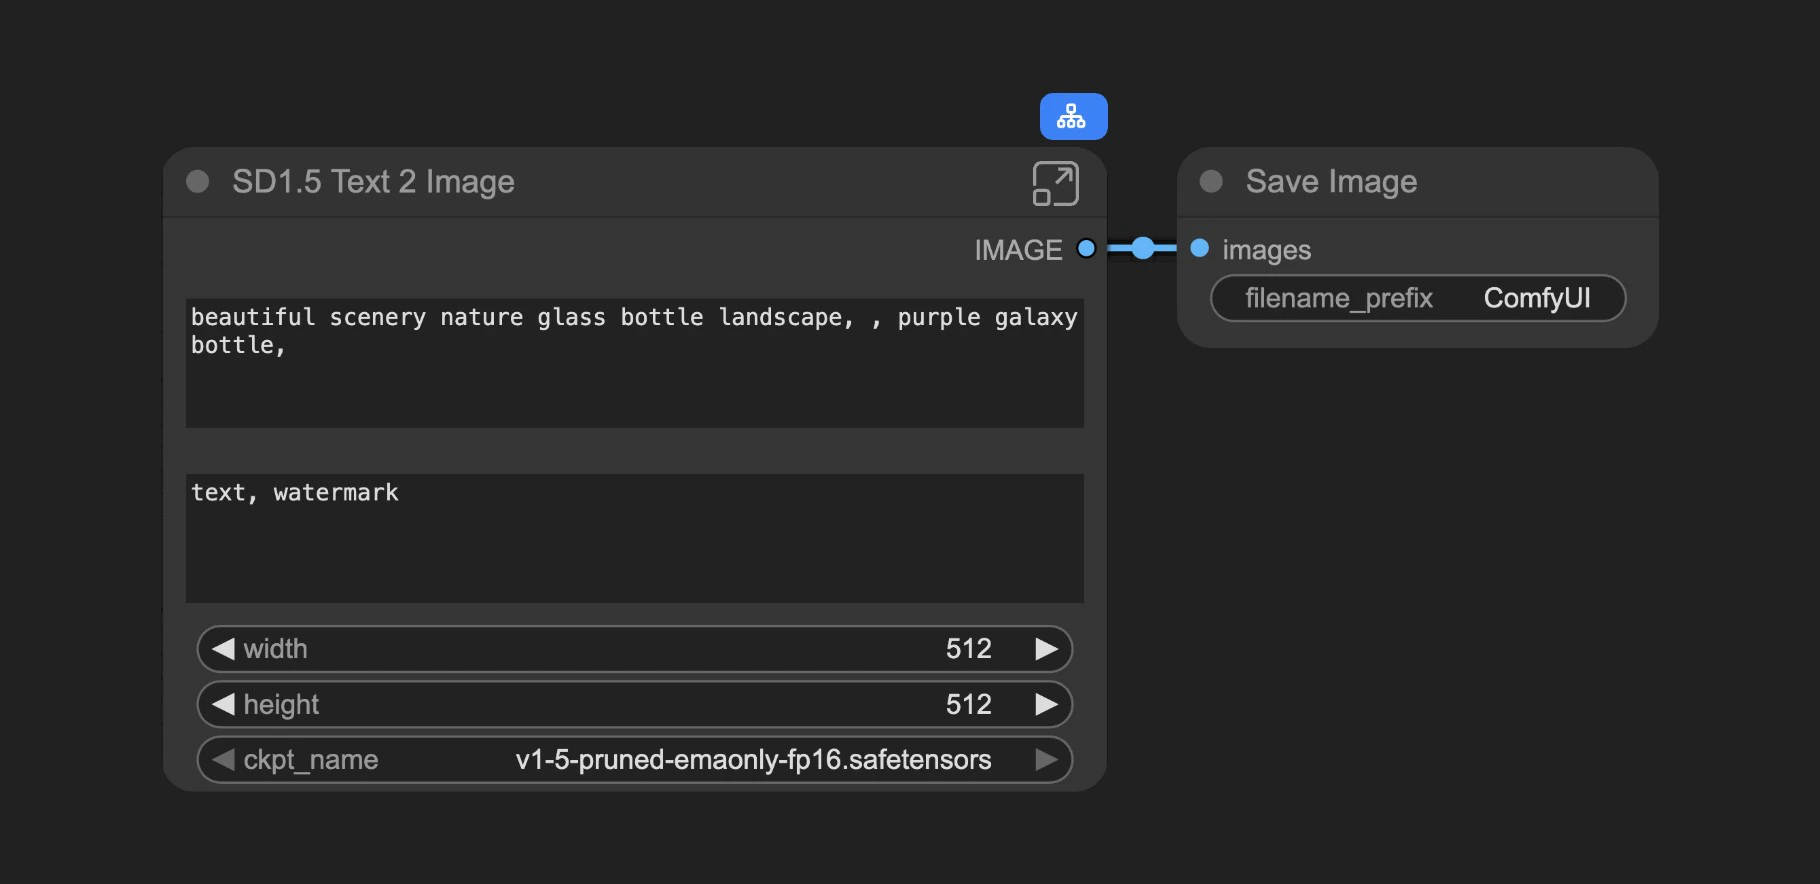
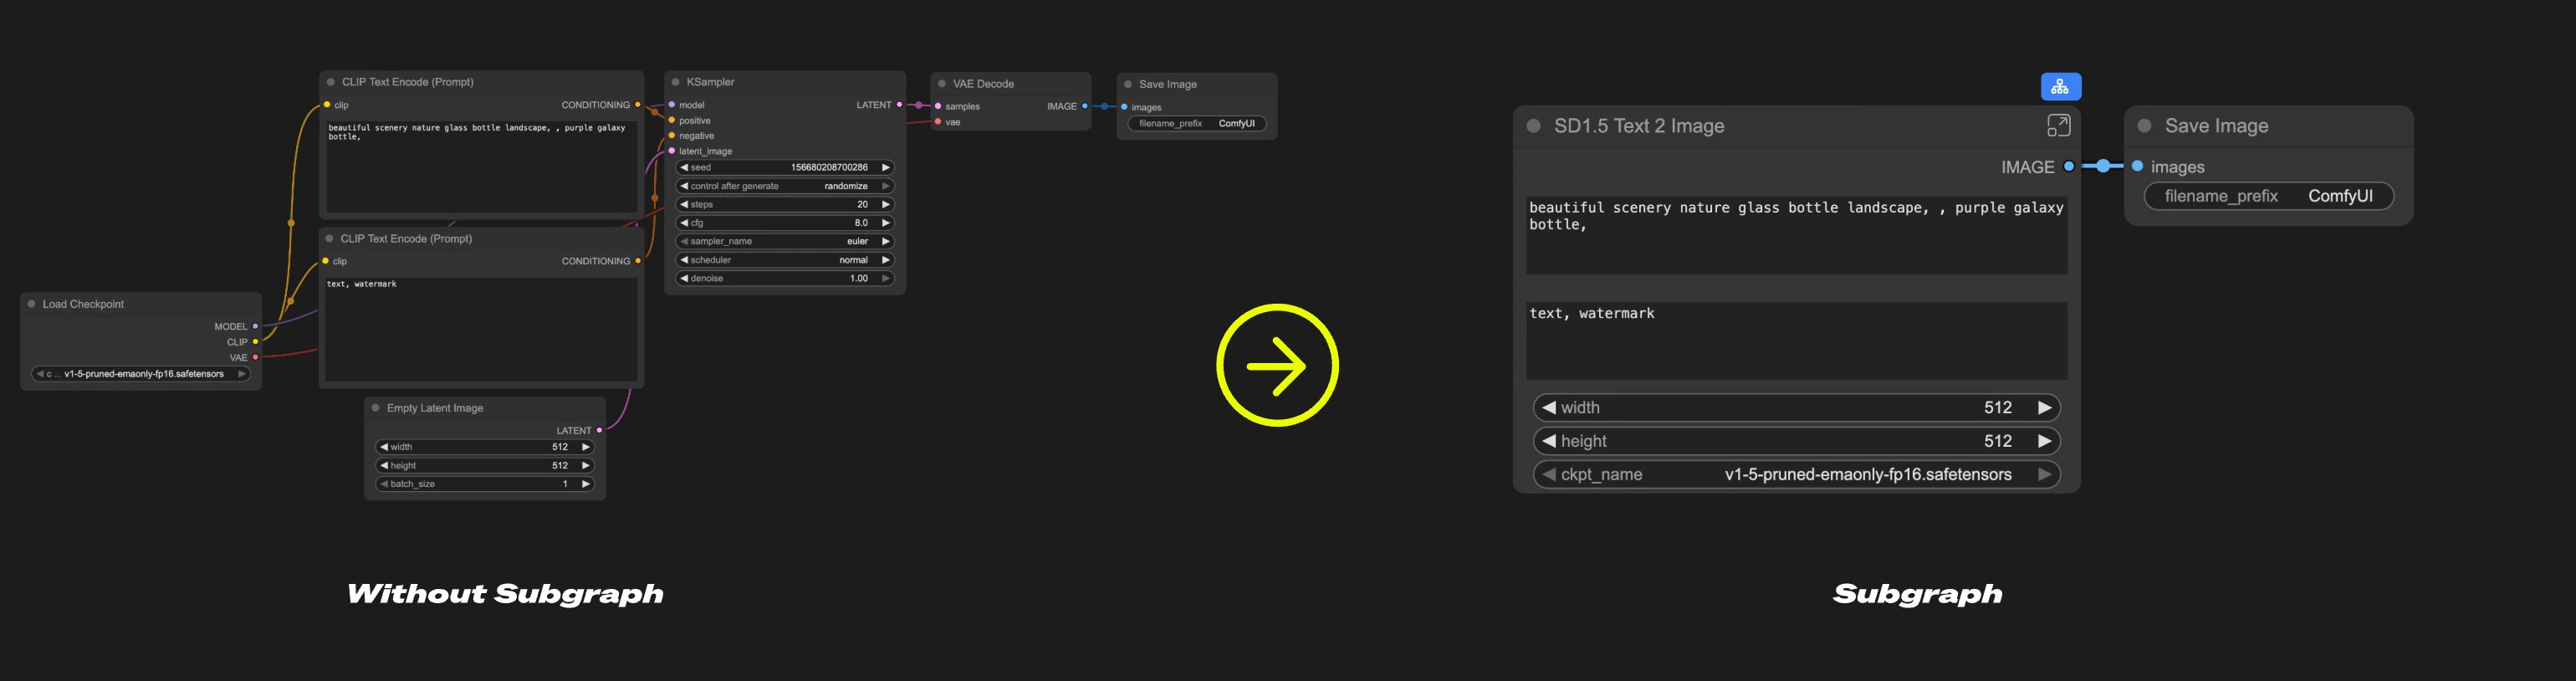 Think of a subgraph as a "folder" for your workflow – you can group related nodes together and use the entire collection as one unified subgraph node.
**Use subgraphs to:**
* Simplify complex workflows
* Reuse common node combinations
* Build more efficient workflows with modular components
## Creating a Subgraph
Think of a subgraph as a "folder" for your workflow – you can group related nodes together and use the entire collection as one unified subgraph node.
**Use subgraphs to:**
* Simplify complex workflows
* Reuse common node combinations
* Build more efficient workflows with modular components
## Creating a Subgraph
 **In edit mode you'll see:**
1. **Navigation bar**: Exit the current subgraph and return to the parent level
2. **Input slots**: Internal node inputs exposed to the outside
* Connect outputs to slots like normal nodes
* **Right-click** connection points to rename/delete exposed slots
3. **Output slots**: Outputs exposed to the outside (same functionality as input slots)
**In edit mode you'll see:**
1. **Navigation bar**: Exit the current subgraph and return to the parent level
2. **Input slots**: Internal node inputs exposed to the outside
* Connect outputs to slots like normal nodes
* **Right-click** connection points to rename/delete exposed slots
3. **Output slots**: Outputs exposed to the outside (same functionality as input slots)
 **Working with slots:**
1. **Default slot** (labeled 1): Use this to add new input/output connections
2. **Right-click** existing slots to rename, delete, or disconnect from original nodes
> Note: Slot connections follow standard data type validation rules
### Nested Subgraphs
Create even more complex workflows by nesting subgraphs within subgraphs.
**Working with slots:**
1. **Default slot** (labeled 1): Use this to add new input/output connections
2. **Right-click** existing slots to rename, delete, or disconnect from original nodes
> Note: Slot connections follow standard data type validation rules
### Nested Subgraphs
Create even more complex workflows by nesting subgraphs within subgraphs.
 The navigation bar shows your current level and lets you easily move between nested subgraphs.