> ## Documentation Index
> Fetch the complete documentation index at: https://utopia.mintlify.site/llms.txt
> Use this file to discover all available pages before exploring further.
# Qwen-Image ComfyUI原生工作流示例
> Qwen-Image 是一个拥有 20B 参数的 MMDiT(多模态扩散变换器)模型,基于 Apache 2.0 许可证开源。
**Qwen-Image** 是阿里巴巴通义千问团队发布的首个图像生成基础模型,这是一个拥有 20B 参数的 MMDiT(多模态扩散变换器)模型,基于 Apache 2.0 许可证开源。该模型在**复杂文本渲染**和**精确图像编辑**方面取得了显著进展,无论是英语还是中文等多种语言都能实现高保真输出。
**模型亮点**:
* **卓越的多语言文本渲染**:支持英语、中文、韩语、日语等多种语言的高精度文本生成,保持字体细节和布局一致性
* **多样化艺术风格**:从照片级真实到印象派绘画,从动漫美学到极简设计,流畅适应各种创意提示
*相关链接*\*:
* [GitHub](https://github.com/QwenLM/Qwen-Image)
* [Hugging Face](https://huggingface.co/Qwen/Qwen-Image)
* [ModelScope](https://modelscope.cn/models/qwen/Qwen-Image)
## Qwen-Image 原生工作流示例
请确保你的 ComfyUI 已经更新。
* [ComfyUI 下载](https://www.comfy.org/download)
* [ComfyUI 更新教程](/zh-CN/installation/update_comfyui)
本指南里的工作流可以在 ComfyUI 的[工作流模板](/zh-CN/interface/features/template)中找到。如果找不到,可能是 ComfyUI 没有更新。
如果加载工作流时有节点缺失,可能原因有:
1. 你用的不是最新开发版(nightly)。
2. 你用的是稳定版或桌面版(没有包含最新的更新)。
3. 启动时有些节点导入失败。
在本篇文档所附工作流中使用的不同模型有三种
1. Qwen-Image 原版模型 fp8\_e4m3fn
2. 8步加速版: Qwen-Image 原版模型 fp8\_e4m3fn 使用 lightx2v 8步 LoRA,
3. 蒸馏版:Qwen-Image 蒸馏版模型 fp8\_e4m3fn
**显存使用参考**
GPU: RTX4090D 24GB
| 使用模型 | VRAM Usage | 首次生成 | 第二次生成 |
| ------------------------------- | ---------- | ----- | ----- |
| fp8\_e4m3fn | 86% | ≈ 94s | ≈ 71s |
| fp8\_e4m3fn 使用 lightx2v 8步 LoRA | 86% | ≈ 55s | ≈ 34s |
| 蒸馏版 fp8\_e4m3fn | 86% | ≈ 69s | ≈ 36s |
### 1. 工作流文件
更新 ComfyUI 后你可以从模板中找到工作流文件,或者将下面的工作流拖入 ComfyUI 中加载
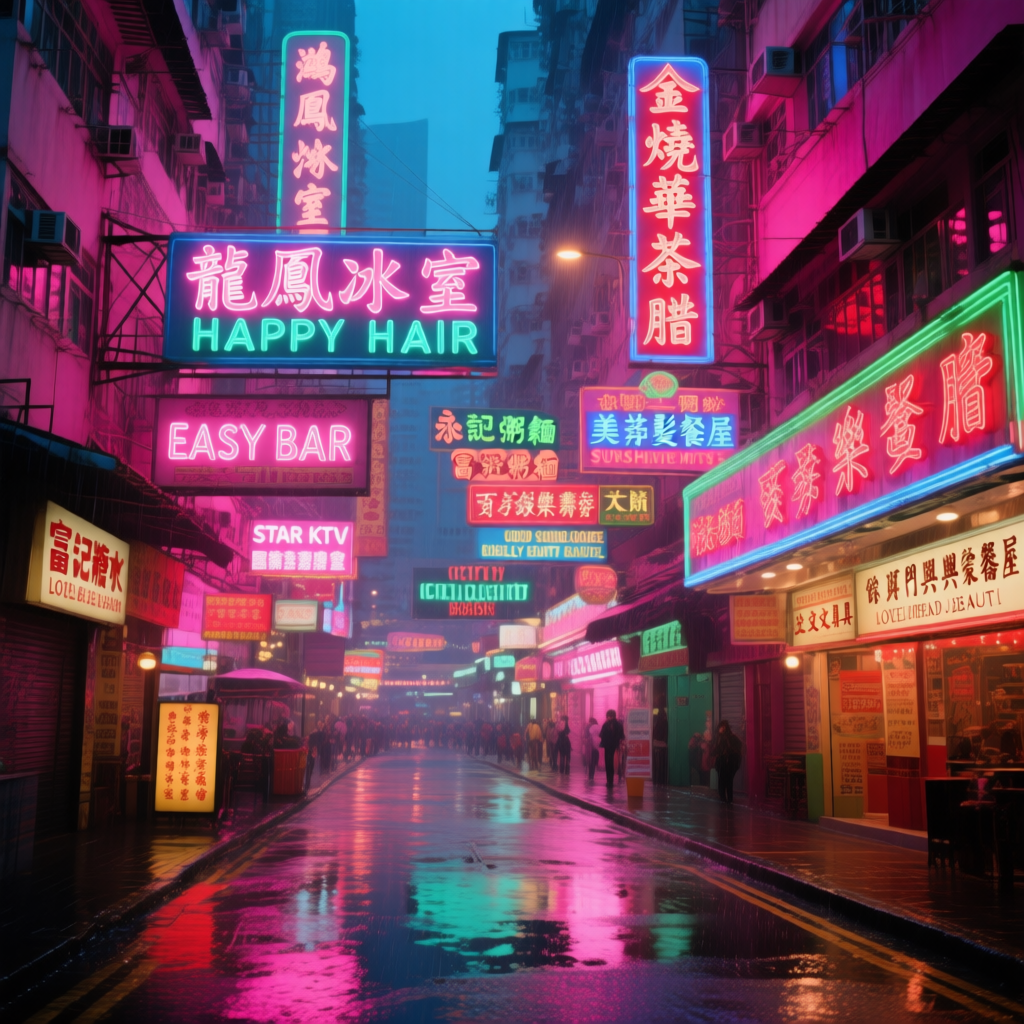
下载官方版 JSON 格式工作流
蒸馏版
下载蒸馏版JSON 格式工作流
### 2. 模型下载
**你可以在 ComfyOrg 仓库找到的版本**
* Qwen-Image\_bf16 (40.9 GB)
* Qwen-Image\_fp8 (20.4 GB)
* 蒸馏版本 (非官方,仅需 15 步)
所有模型均可在 [Huggingface](https://huggingface.co/Comfy-Org/Qwen-Image_ComfyUI/tree/main) 或者 [魔搭](https://modelscope.cn/models/Comfy-Org/Qwen-Image_ComfyUI/files) 找到
**Diffusion model**
* [qwen\_image\_fp8\_e4m3fn.safetensors](https://huggingface.co/Comfy-Org/Qwen-Image_ComfyUI/resolve/main/split_files/diffusion_models/qwen_image_fp8_e4m3fn.safetensors)
Qwen\_image\_distill
* [qwen\_image\_distill\_full\_fp8\_e4m3fn.safetensors](https://huggingface.co/Comfy-Org/Qwen-Image_ComfyUI/resolve/main/non_official/diffusion_models/qwen_image_distill_full_fp8_e4m3fn.safetensors)
* [qwen\_image\_distill\_full\_bf16.safetensors](https://huggingface.co/Comfy-Org/Qwen-Image_ComfyUI/resolve/main/non_official/diffusion_models/qwen_image_distill_full_bf16.safetensors)
- 蒸馏版本原始作者建议在 15 步 cfg 1.0
- 经测试该蒸馏版本在 10 步 cfg 1.0 下表现良好,根据你想要的图像类型选择 euler 或 res\_multistep
**LoRA**
* [Qwen-Image-Lightning-8steps-V1.0.safetensors](https://huggingface.co/lightx2v/Qwen-Image-Lightning/resolve/main/Qwen-Image-Lightning-8steps-V1.0.safetensors)
**Text encoder**
* [qwen\_2.5\_vl\_7b\_fp8\_scaled.safetensors](https://huggingface.co/Comfy-Org/Qwen-Image_ComfyUI/resolve/main/split_files/text_encoders/qwen_2.5_vl_7b_fp8_scaled.safetensors)
**VAE**
* [qwen\_image\_vae.safetensors](https://huggingface.co/Comfy-Org/Qwen-Image_ComfyUI/resolve/main/split_files/vae/qwen_image_vae.safetensors)
模型保存位置
```
📂 ComfyUI/
├── 📂 models/
│ ├── 📂 diffusion_models/
│ │ ├── qwen_image_fp8_e4m3fn.safetensors
│ │ └── qwen_image_distill_full_fp8_e4m3fn.safetensors ## 蒸馏版
│ ├── 📂 loras/
│ │ └── Qwen-Image-Lightning-8steps-V1.0.safetensors ## 8步加速 LoRA 模型
│ ├── 📂 vae/
│ │ └── qwen_image_vae.safetensors
│ └── 📂 text_encoders/
│ └── qwen_2.5_vl_7b_fp8_scaled.safetensors
```
### 3. 按步骤完成工作流
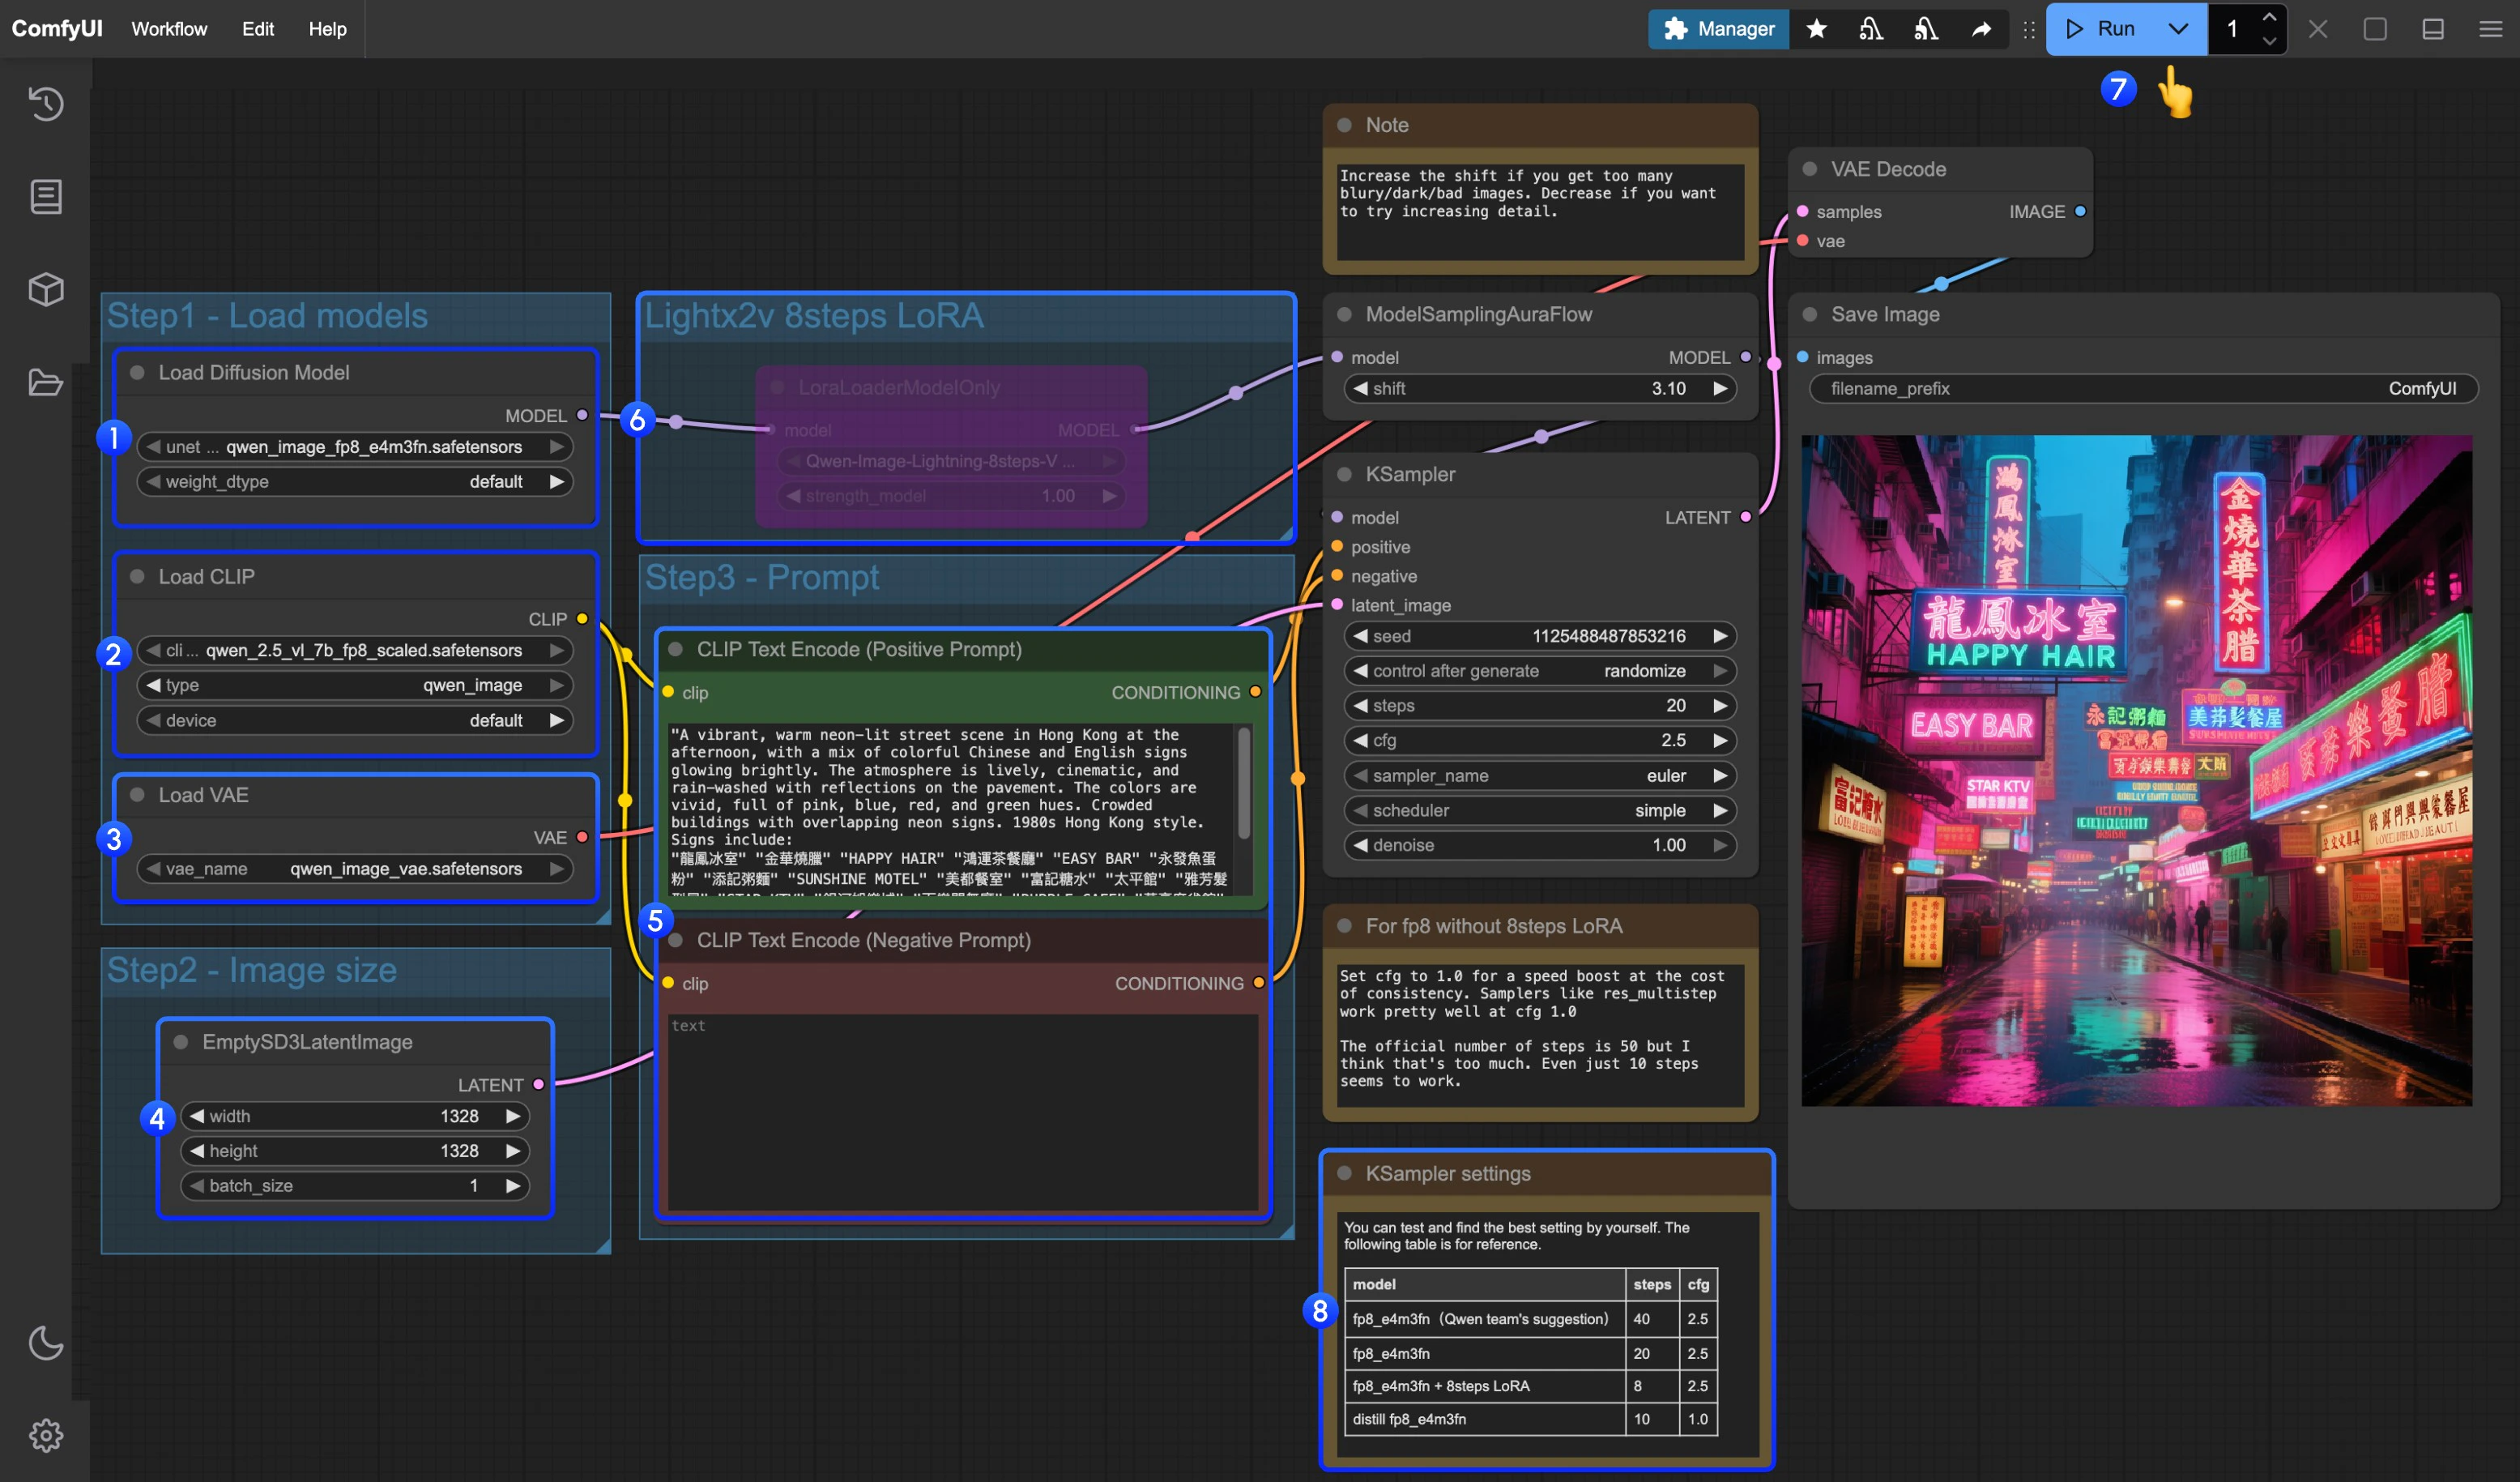 1. 确保 `Load Diffusion Model`节点加载了`qwen_image_fp8_e4m3fn.safetensors`
2. 确保 `Load CLIP`节点中加载了`qwen_2.5_vl_7b_fp8_scaled.safetensors`
3. 确保 `Load VAE`节点中加载了`qwen_image_vae.safetensors`
4. 确保 `EmptySD3LatentImage`节点中设置好了图片的尺寸
5. 在`CLIP Text Encoder`节点中设置好提示词,目前经过测试目前至少支持:英语、中文、韩语、日语、意大利语等
6. 如果需要启用 lightx2v 的 8 步加速 LoRA ,请选中后用 `Ctrl + B` 启用该节点,并按 序号`8` 处的设置参数修改 Ksampler 的设置设置
7. 点击 `Queue` 按钮,或者使用快捷键 `Ctrl(cmd) + Enter(回车)` 来运行工作流
8. 对于不同版本的模型和工作流的对应 KSampler 的参数设置
蒸馏版模型和 lightx2v 的 8 步加速 LoRA 似乎不能同时使用,你可以测试具体的组合参数来验证组合使用的方式是否可行
1. 确保 `Load Diffusion Model`节点加载了`qwen_image_fp8_e4m3fn.safetensors`
2. 确保 `Load CLIP`节点中加载了`qwen_2.5_vl_7b_fp8_scaled.safetensors`
3. 确保 `Load VAE`节点中加载了`qwen_image_vae.safetensors`
4. 确保 `EmptySD3LatentImage`节点中设置好了图片的尺寸
5. 在`CLIP Text Encoder`节点中设置好提示词,目前经过测试目前至少支持:英语、中文、韩语、日语、意大利语等
6. 如果需要启用 lightx2v 的 8 步加速 LoRA ,请选中后用 `Ctrl + B` 启用该节点,并按 序号`8` 处的设置参数修改 Ksampler 的设置设置
7. 点击 `Queue` 按钮,或者使用快捷键 `Ctrl(cmd) + Enter(回车)` 来运行工作流
8. 对于不同版本的模型和工作流的对应 KSampler 的参数设置
蒸馏版模型和 lightx2v 的 8 步加速 LoRA 似乎不能同时使用,你可以测试具体的组合参数来验证组合使用的方式是否可行